As we wrote recently, WordPress is not only the leading blogging software platform, it has become one of the most used and most popular “content management systems” (CMS) for managing a wide variety of websites, especially those used by small businesses. However, for anyone just starting out with it, WordPress can be a bit daunting to manage on a day-to-day basis.
Here’s a quick guide to help you streamline the management of your WordPress website.
1. Switch to managed hosting.

(Thinkstock)
If you’re not already using it, switching to managed hosting for your WordPress site is a great way to take a load off yourself. Managed hosting means that the host provides a range of services specific to WordPress that makes your site run faster and more securely. They take care of the server configuration and installation of WordPress, will upgrade WordPress for you whenever updates come out, and will even set up automatic backups in case anything goes wrong.
All this automation comes at a premium, of course. Managed hosting solutions for WordPress typically cost more than $100/month, but if you’re managing your WordPress site yourself and are wasting valuable time maintaining it — time that could be spent managing your business, instead — you might be better off paying the extra. Time is money and all that.
There are lots of providers out there. For example, SmallBusiness.com is hosted using the service WP Engine. They have a individual and small business plans starting at $30/month, which should be more than enough to handle most small business websites that run on WordPress.
2. Turn off comments.

(Photo Illustration: SmallBusiness.com & ThinkStock)
Crazy, right? And controversial. Comments are the foundation of community on the internet, right? Maybe… or maybe you spend too much time moderating comments that could be spent on more useful things, like writing new content. To turn off comments, go to your WordPress admin panel and navigate to Settings > Discussion. Uncheck the “Allow people to post comments on new articles” box, scroll down and hit save.
3. Don’t want to turn off comments? Automatically filter them for spam.
(Illustration: SmallBusiness.com)
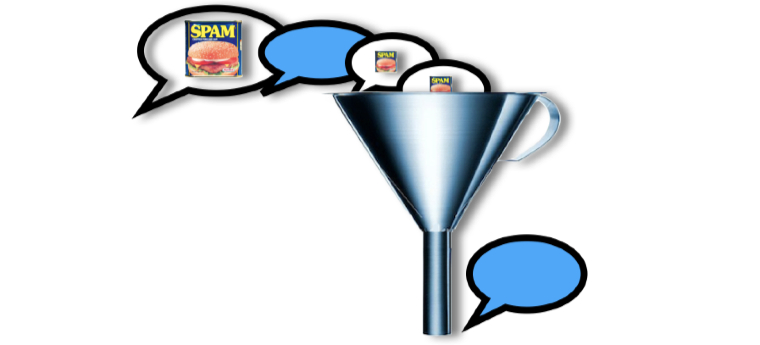
There are plenty of good reasons to have comments on your site — customers raving about how awesome your products are should be good for sales, after all. If you don’t want to spend an hour each day reading about the latest version of Viagra, courtesy of the latest wave of spam bots, you should be filtering your comments for spam. The best WordPress plugin out there right now is Akismet; it’s so good it ships with WordPress by default. To turn it on you’ll need a product key. Head over to the Akismet plans page to get one and fight the spam.
4. Set up automatic backups.

(ThinkStock)
Disasters do happen on the internet, and I’m guessing that losing all the data on your website would be bad for business. Protect yourself by making at least weekly backups of the database and content on your site. There are a variety of plugins out there, but I recommend UpdraftPlus. It allows you to schedule backups, which will be stored both on your server and a remote destination of your choice, including Google Drive or Dropbox.
5. Get your tags and categories set up properly.

(FontAwesome)
The distinction between tags and categories can be confusing at first, but once you get it your site will be easier to navigate and manage. Here’s the distinction:
Categories: Think of categories as containers that you put your posts in. Just like physical containers, categories are hierarchical — they can contain other categories within themselves. While you can put a post in more than one category, it’s best practice to keep it to just one or two.
Tags: Think of tags as labels that you attach to your posts that tell you what it’s about. You can have many tags (labels) on a single post, but for organization’s sake it’s best to have a pool of labels that you choose from — say 100 or 150.
In addition to making your site easier to manage, following these guidelines will help with SEO, as well. It’s easiest to manage if you set up your categories and tags ahead of time (under the Posts menu in the admin panel), and then choose from the premade ones when you write posts.
6. Understand user roles.

(ThinkStock)
You’re probably not the only person at your business writing content for the site. Luckily, WordPress comes with user roles that make it easy to give people just enough access to write content, but not enough access to screw anything up.
You can set a user’s role by navigating to a user’s profile (Users > All Users > “User’s Name”) and then setting their role under the “Name” section. Here’s a breakdown of the different roles:
Administor: This person is the real deal, and can edit and delete everything, including your theme files and articles.
Editor: Can do most tasks that involve editing and publishing posts, and can manage the posts of others.
Author: Can edit and publish posts, but only their own posts.
Contributor: Can edit and submit posts for approval — an editor or administrator will have to look over their posts and publish them before they go live.
Subscriber: Can log in and edit their profile, but do nothing else. Useful if you want to send notifications to people through the WordPress user system.
Generally, you should set people to the lowest role necessary for them to do their job.That way you don’t have to spend time telling them, “No, you may not edit the code in the index.php file,” because they can’t do it anyway.
7. Set your preferred screen options on the Administrative Page.
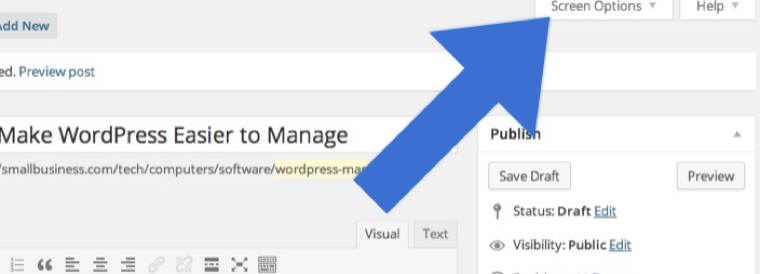
There are several features on the Administrative Page that can be semi-hidden if you don’t know where to look. On most admin panel pages, look at the top right corner of the screen just below the admin bar — you should see a tab titled “Screen options” with a dropdown arrow next to it. Click on that tab and you’ll see a row of checkboxes. Anything that’s checked appears on the page, and anything not checked is hidden. This is a great way to either remove information that’s cluttering the display, or find options that you think should exist but can’t find (this is particularly true on the post edit page).
8. Install and set up a search engine optimization (SEO) plugin.
(Illustration: Yoast SEO)
Your site isn’t much use if no one can find it. WordPress does a decent job of SEO out of the box, but if you really want to get people noticing you a SEO plugin should do the trick. We recommend WordPress SEO by Yoast, since it’s user friendly and does pretty much everything you can think of for basic SEO, including creating site maps, setting page meta information on individual posts, and adding tags for social networks like Facebook and Twitter.
9. Take advantage of the media library.

Media handling in WordPress has improved by leaps and bounds in recent years, and I think the media library is still an underutilized aspect of many WordPress blogs. If you reuse images or other media at all on your site, it’s worth your while to edit their meta information (things like the caption and keywords) in the media library, so that information travels with the images wherever you put them on the blog.
You can access the media library by clicking on “Media” in the left hand sidebar in the WordPress admin panel. Assuming you’ve uploaded media in the past, you’ll see a list of uploaded items on the screen — click on any one of them to edit it. On images, you’ll see three, perhaps confusing fields. Here’s what they mean:
Caption: A short description that will be displayed wherever the image is inserted.
Alternative Text: This won’t appear on the site to visitors, but it will be in the code, and this is what search engines use to tell what the image is about. You can leave the other fields blank, but the alternative text or “alt text” should always be filled in.
Description: This can be a longer description that is often used by themes to accompany thumbnails.
Also, clicking on “edit image” on this page will allow you to do basic crops, image resizing and rotations within WordPress.
10. Go fullscreen when you’re writing and editing.
![]()
Even if you turn off some of the screen options (if you don’t know what I’m talking about, you’ve been skimming too fast), the post edit screen can be a cluttered experience. To keep your mind on the words, hit the most useful button in the post editor — the fullscreen button.
